Adding PayPal to the payment options in Shipstation offers many benefits because it will make shipping easier and faster. In addition, it allows you to import order information and print and create shipping labels.
That way, preparing several orders at once is simple and it still meets the established delivery deadlines. Through Shipstation, it is possible to manage all orders from the main marketplaces and shopping carts.
Procedure for connecting Shipstation with PayPal
You have to meet some basic requirements to connect both accounts. It is essential to have an active PayPal Business or Premier account and to grant third-party access to PayPal to connect both accounts successfully.
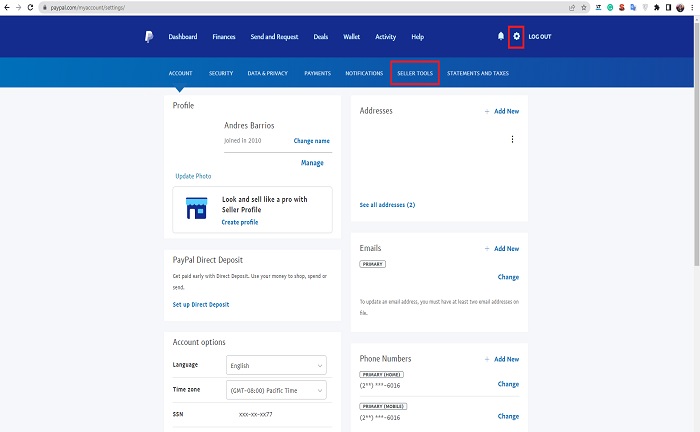
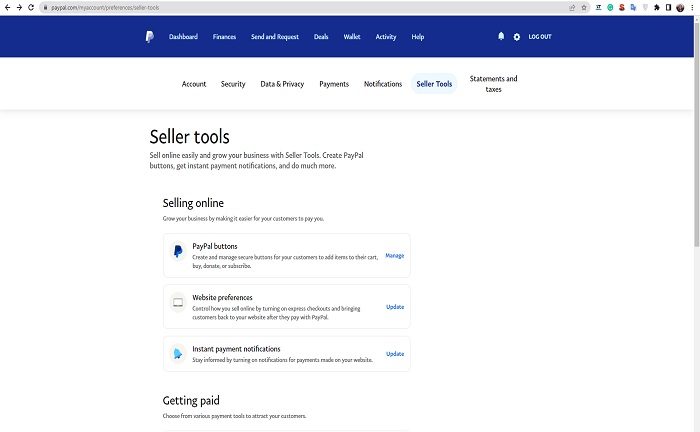
The process is simple, log in to your PayPal account and select “profile” on the top right-hand side of the page. Some options will be displayed, among them, you will find “Profile and settings.”


A new page will open where you should place the username to which the permission will be granted and select the option “add new third-party permissions.” It is time to select the permissions granted to third parties and select “add.”
Please note that the username that will be allowed access will look like this: payments_api1. Shipstation.com. The permissions to grant are:
- Getting information about a single transaction
- Searching your transactions for items matching specific criteria and displaying the results
It is essential to include a shipping address before continuing with the process. After doing all the above, it is time to connect the accounts.
Account connection process
Now, for the connection, the first step is to access the PayPal merchant account and log in. Once inside, go to “account settings,” located in the drop-down menu under the account profile name.
It is time to look for the “account access” option and click on “update” to access the API. Here is where you need to enter all the information mentioned above, and after accepting the appropriate permissions, it is time to log into the Shipstation account.
Inside Shipstation, it is time to go to “account settings” and look for “sales channels”. This option is on the left sidebar. When you open the new sale, you must choose “store settings.”
Here you will find the blue button “connect a store or marketplace,” which you must click, and in the next option, select the “PayPal” tile. The box to enter the PayPal email will appear, and it is time to press “send email verification.”
What’s next?
A verification email will be sent to the address that must be opened and you must then follow the steps outlined to verify the email address. Once verified, it is time to select “test connection,” and when the connection is verified, press “next.”
It is time to select whether Shipstation should use the PayPal transaction ID or the invoice number, which will be used as the order number when creating the order. When you select the preferred option, you can click “next.”
The following pages are selection pages for configuring how the order will be accessed. It is time to select whether Shipstation can import all or only certain types of transactions.
Then you select “connect.” After completing all the connection steps, you will be connected to Shipstation and redirected to the store configuration page to start with the store-specific configuration, such as branding, product handling, and notification preferences.


